I'll be moving soon for work, and because of that I've been going through the many, many shelves of hobby stuff that I have. This has brought a lot of half-finished projects back up to the surface, and one of those was some old Hirst Arts bricks glued to a circle of cork. I figured that it would be a nice planter in the center of a market center, and I got halfway through that idea before it sat doing nothing for some years. Well I've been picking through the latest Dungeons & Lasers stuff from their Encounters Kickstarter, and they had this nice tree that I thought would be perfect for this project.

The specific tree was sold as a Spirit Tree, and as such came injected in see through plastic. I honestly didn't really like it as a transparent tree, but thought it would make a really good looking oak tree. So I super glued it to the center and added some playground sand. I was about to call it good, but I had a box of fried rice from Costco that had some really nice, thin cardboard. The fried rice was also good.
I cut a bunch of randomly sized squares and rectangles, and I started to lay them at random on the cork. I trimmed the corners of every piece, which, while it took a while, added a nice look to the tiles. On some of the larger tiles, I used my Xacto knife to draw in some cracks. I also textured the tiles with a texture tool I made with left over green stuff. At first you can be quite random with where you place the tiles, but as the spaces start to fill in you'll have to use a pencil to draw out the shape you need then glue them in place.

I thought the transition from tile to stone was a little abrupt, so I glued
Army Painter Battlefield Basing around the outer perimeter of the stone wall and in some of the largest gaps between tiles. Where the tiles had large gaps near the edge of the cork, I cut with my Xacto to look like some of the underlying rock had torn away. This broke up the uniformity and made it more visually interesting. I dug through my bits and I had these benches also cast from a Hirst Arts mold, so I glued those on either side of the tree.
Once dry, you can paint this pretty much however you want. I decided to be a little cheeky and paint the tree similar to the
Weirwood Trees from Game of Thrones. The Hirst Arts casts were quite absorbent so it took more layers of paint than I was expecting to get good coverage.
The bricks/stone were basecoated with Folk Art Wrought Iron, which is a very dark grey. Again, this took a lot of layers to get right. Once I was satisfied, I took Folk Art Black and watered it down to make a wash, which I then liberally coated the model with. I drybrushed with DecoArt Sand Grey and then again with Folk Art White. I picked out a few of the tiles with GW Agrax Earthshade for some variety.
I painted the earth and the benches with Folk Art Burnt Umber, which is just a really good brown for this sort of stuff. I drybrushed with DecoArt Khaki and called it a day. I then sprinkled some flocking and added a few tufts of static grass and I could switch to the tree.

To prime the model I used my standard Vallejo Airbrush Gray Primer. I then took the same DecoArt Sand Grey to basecoat the model. This helps to tie all of the colors together and unify the model from a color perspective. To get the recess shading, I used GW contrast Apothecary White, which slightly tones the model grey but gives me good shading. Watch for any pooling as it the paint can dry pretty thick and obscure some details. I went back and drybrushed with Sand Grey and then White to bring the color back. In the eyes, I dabbed a bit of GW Carroburg Crimson, letting it run down a little into the grooves. I applied dots of GW Blood for the Blood God in the eye sockets to complete the effect. I had some slight cleanup to do with some Sand Grey when the red got too far.
Finally I had the tree canopy. I basecoated it with Craftsmart Brick Red, then washed it all over with GW Carroburg Crimson. I then drybsrushed with AP Pure Red, and glued it to the top of the tree.
And that's it! I finally finished a project that had been sitting for a long time, and I painted a tree that's not your stereotypical brown trunk with green leaves. Really happy with how it turned out.
-The Space Dinosaur
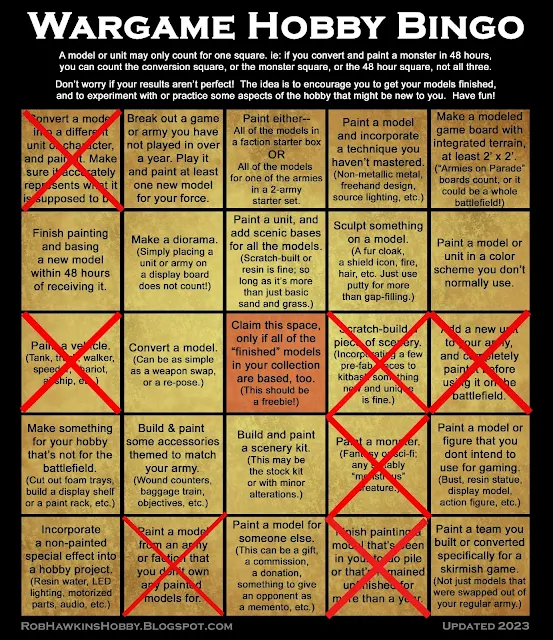
I also got another tile on bingo, this time the finish painting a model that has been sitting unfinished for over a year.


Really great result and the piece looks really good. I love hirst arts blocks. I have a lot of terrain made with them for my lotr stuff.
ReplyDeleteThough I don’t know who would want to sit under that tree. It’s spooky. 😀
Big thanks! They have some really neat molds, it just takes such a long time to make a useable amount of them... 😅
DeleteIt is spooky, maybe the locals try to appease them so as not to get cursed, haven't quite decided yet.