
Welcome back to the second post in the Spooktober series! In this article, I will cover how I made a pumpkin patch for my Age of Sigmar games. Really this terrain piece would work fine in any medieval or historical setting, so even if you don't play Warhammer you'll get some good use out of this.

The materials you need for this project are pretty simple to get a hold of: MDF for the base, cardboard, sand, some wall filler, flock, lichen, and finally the pumpkins themselves.
The first step is to cut out the base. I used some MDF bases I bought off of Etsy, but you can use any material here. Just know that if you use something like cardboard that it will be susceptible to warping and you'll have to take some steps to counteract that.
Next, cut some corrugated cardboard to match the shape of the base, but slightly smaller so that about a 1/4 inch of the MDF is bare around the rim. Using the wall filler, smear the rim until there is a smooth transition from the base to the cardboard.


Once everything is dry, take some sand and use it to coat the cardboard in texture. Don't worry if some larger grains stick, these will end up looking like stones later.

After that step dries, go ahead and paint the entire piece in Burnt Umber. I use cheap craft paints as I see no need to waste any of my nicer GW or Army Painter paints. The wall filler can be absorbent, so it may take a few layers to get a solid coat. I used a hair dryer to speed up the drying process.

Again, once the Burnt Umber coat is dry, you can proceed to the drybrush stage. I use a very large cheap brush for larger terrain pieces to save some time. First, drybrush with khaki, then a 50/50 mix of khaki and white, and finally, very lightly, a drybush of pure white. Once you're satisfied with the look of the base, we can move onto the pumpkins.

For pumpkins, there are a variety of sources. You can either make them yourself from clay or foam, or you can buy ready made ones from Etsy. I prefer to wait till October since all of the craft stores like Michaels and Hobby Lobby will be inundated with Halloween and fall decorations. I picked up the following pumpkins from Michaels, and with coupons it came out to about $2.

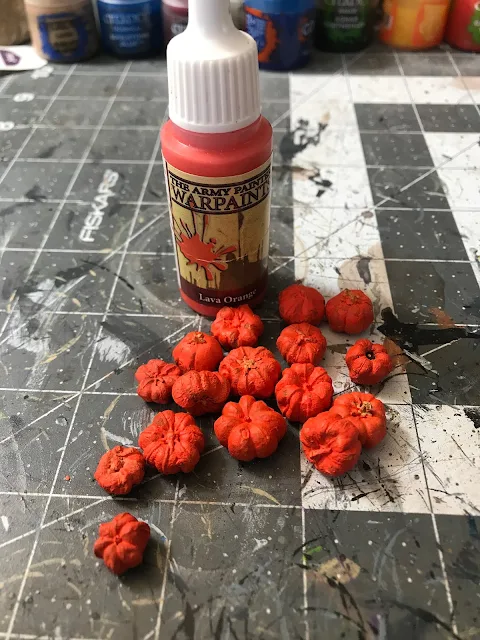
I picked out the pumpkins that I thought matched the scale of my miniatures best and gave them a nice basecoat of Lava Orange (AP). You're going to get your fingers dirty here a bit, but that's just what our hobby is like anyways. At this point, I kicked out a few more pumpkins that I thought were too misshapen.

Set aside the pumpkins to dry and grab the base from earlier. Flock with whatever ground flock you like, I use Woodland Scenics. You could leave it like this and it looks like a nice empty field.

Now take some lichen and hot glue the bunches onto the top of rows. I left some spaces open so that the ruts show through. Take care to remove any strands of hot glue that remain. You can leave the piece like this, but without the pumpkins I think it looks kind of bad.
Since hot glue dries quickly, you can immediately start gluing some pumpkins down. Before you do, place a few to make sure you like the look of it. I didn't end up using all of the pumpkins that I painted since it made the field look too crowded.

Lastly are some details. With the pumpkins glued on, it is now much easier to wash them. I used Carroburg Crimson (GW) to tone down the orange but still give each one a nice, clean, and warm hue.
Taking some strands of the lichen, I super glued the ends to what would be the stem of each pumpkin. This little detail adds a lot the look of everything. Then I placed down a few birch seeds to look like fall leaves.
Now spray the entire piece with some dull coat to protect the paint and harden the lichen, and you're all done! A nice little pumpkin patch to fight over.


Excellent idea, simple, effective, very well executed! I like the fact that you stated the colors used.
ReplyDeleteCheers,
JB
Thanks I really appreciate that! I’ll make sure to keep listing the colors I use, love the feedback.
Delete